Getting Started
Welcome to the "Getting Started" guide for the Low Power Edge AI Camera.
This section aims to provide you with essential information to swiftly initiate your experience with Tokay Lite.
We encourage you to follow the steps diligently, ensuring a smooth and efficient start to your exploration of Tokay Lite!
Powering Up
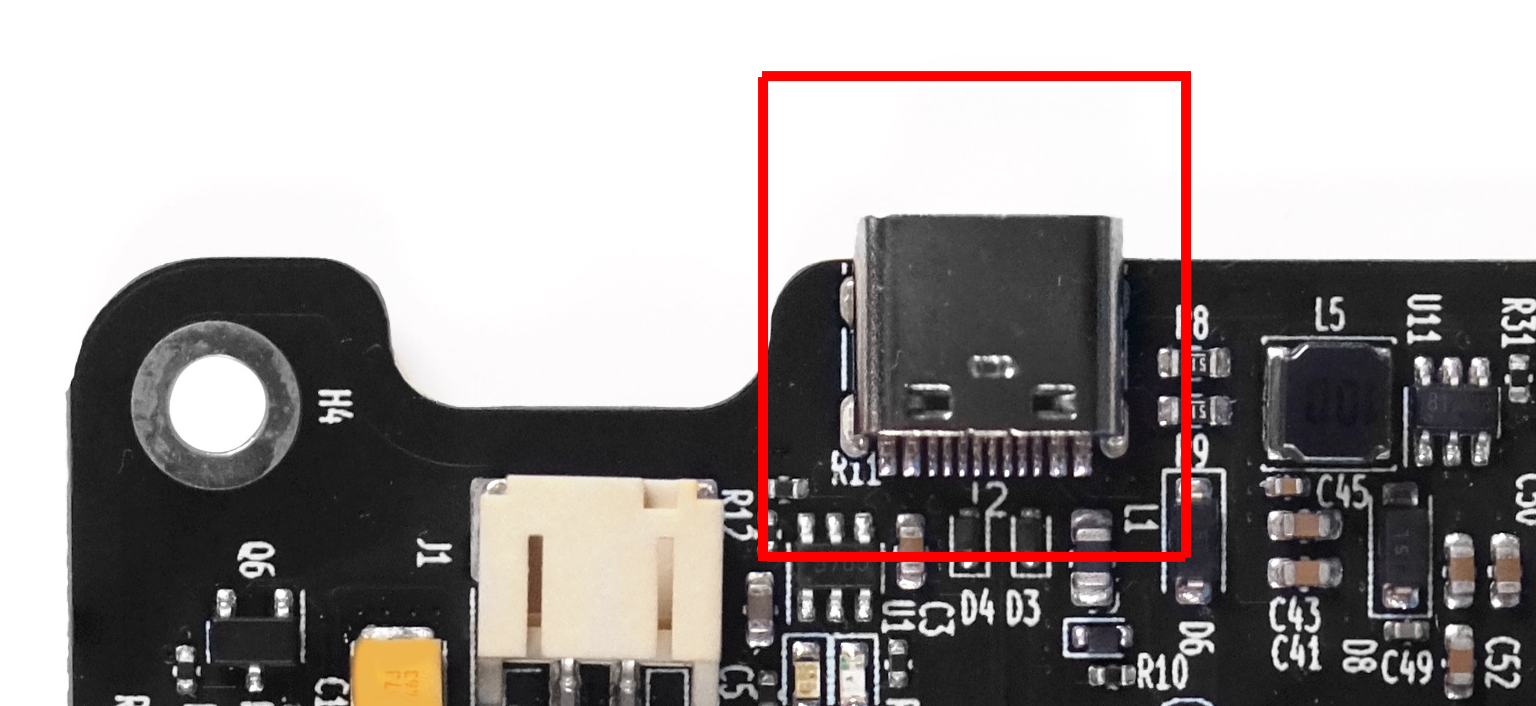
To begin the power-up process, connect the Edge AI Camera to a PC or any other USB power source using a USB-C cable. Make sure you use a stable power supply capable of delivering up to 1A to the camera, enabling it to function efficiently.
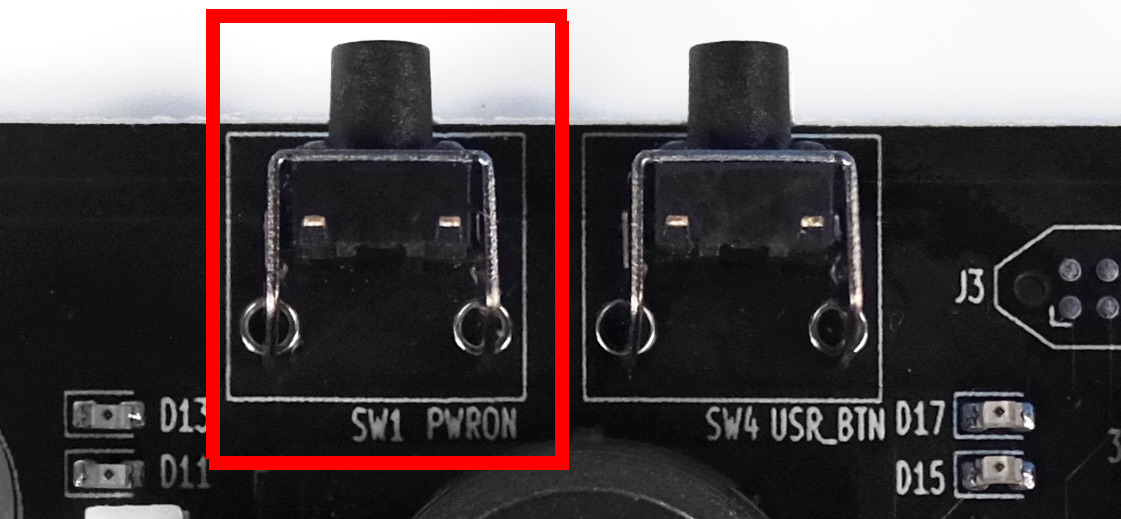
After plugging in the USB cable, it's time to activate the camera.
This is achieved by pressing the designated PWR_ON
button as shown below. When you do this, the camera will
transition from a standby state to operational mode, ready to
be further configured.
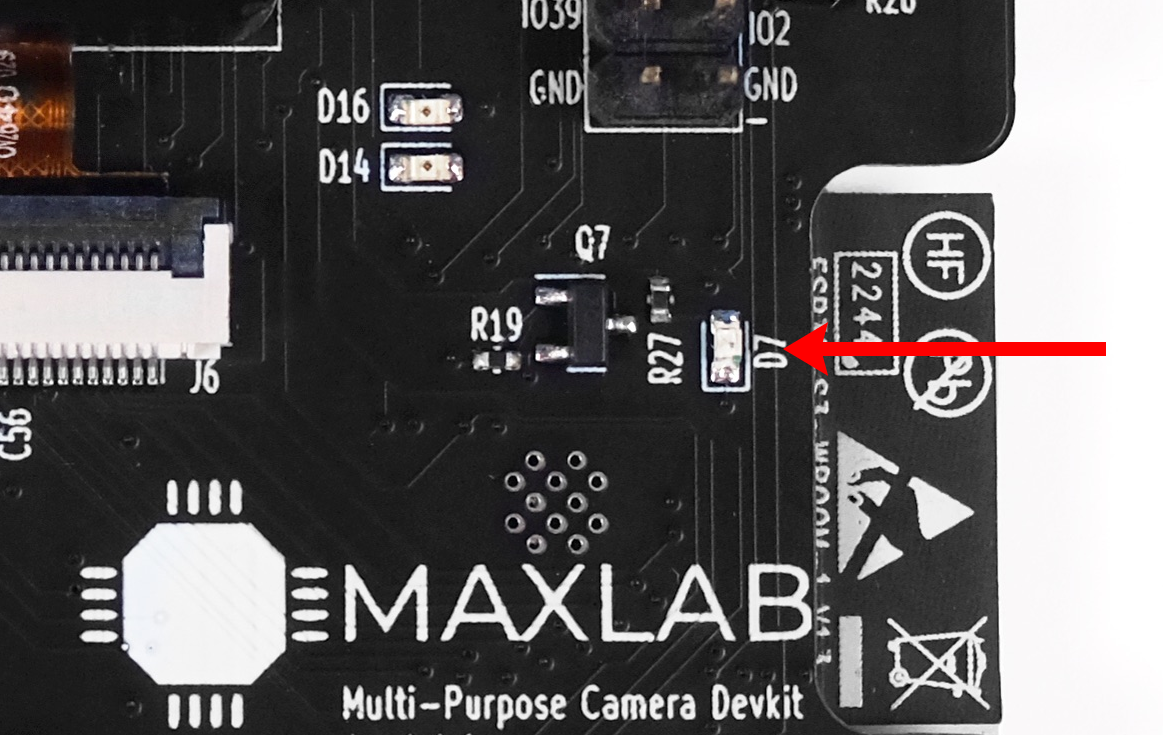
To confirm that the camera is indeed active, observe the red
USER LED blinking every second. This visual cue is essential to
verify that the camera is ready for next steps, namely, WiFi
configuration.
Configuring the WiFi Connection
When Tokay Lite shipped from the factory, it lacks any WiFi credentials. The camera doesn't come pre-programmed to connect to your home network. Therefore, it's imperative to instruct the camera about your WiFi environment. This process is achieved through a straightforward trick of connecting to the camera own AP first:
-
Locate the Camera WiFi network in your device's available networks list. The camera network is named as "Tokay AP".
-
Connect to the network to establish a direct connection between your device and the camera. Once connected to the Camera WiFi, open your web browser and navigate to the camera WiFi configuration page.
If your device supports mDNS, then use http://tokay-lite.local as web page address. If that fails or your devices isn't mDNS-aware, use direct IP address: http://192.168.4.1
-
Using the WiFi configuration page, input your home WiFi credentials. Upon doing this, the camera will store these credentials, enabling it to connect to your home network. To confirm that the camera has successfully connected to your WiFi network, observe the
USER LED.During the connection, the LED will blink rapidly.
-
Check the LED after a short period of time. When the camera is connected, the
USER LEDwill stay permanently ON. This visual cue is essential to verify that the camera is now online and ready to perform tasks over the WiFi connection.
Checking Camera Operation
To ensure your camera is operating as expected within your network, we utilize mDNS (Multicast DNS) for simplified camera discovery. mDNS is a protocol that allows devices to discover and identify each other on the local network without the need for a centralized DNS server. This is particularly useful for locating the camera's web-based configuration interface.
To check your camera's operation, follow these steps open your web browser and navigate to http://tokay-lite.local.
In most cases, you can access the camera's web-based configuration page by simply entering "tokay-lite.local" in your browser's address bar. This will direct you to the camera's settings interface.
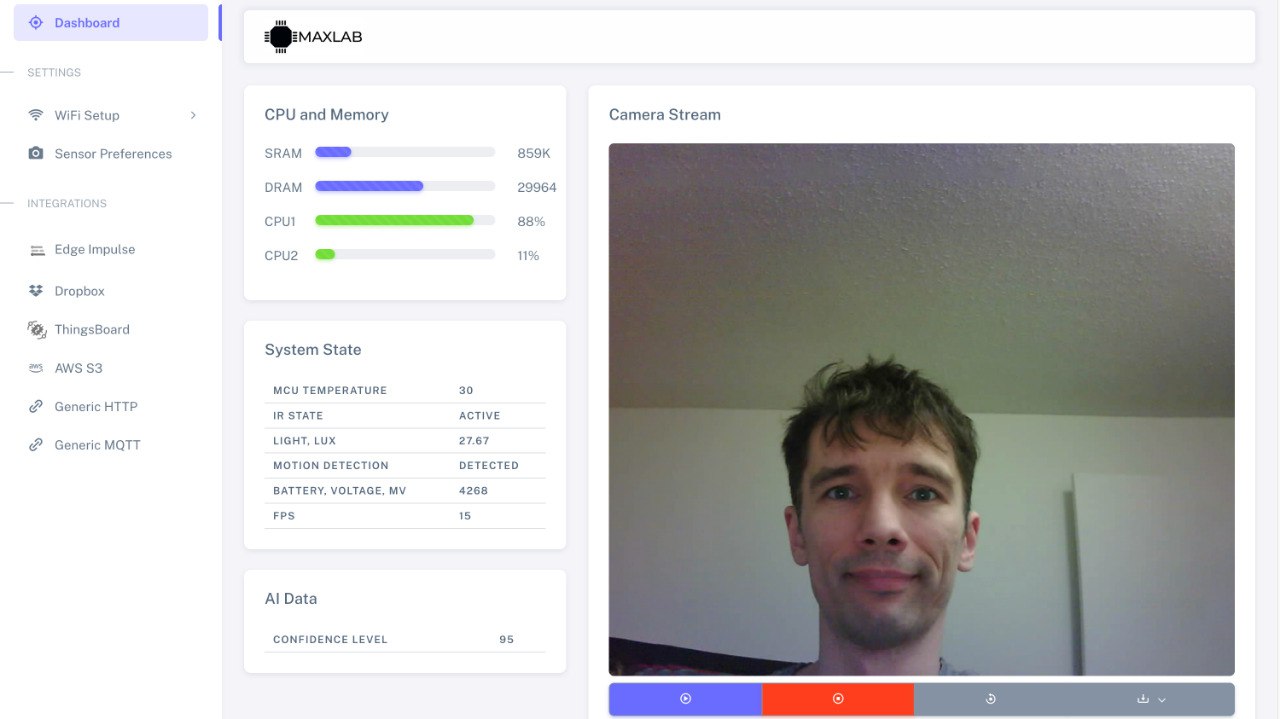
Upon reaching the camera's configuration page, you can confirm that the camera is operational by verifying its settings and status. The interface provides an overview of the camera's configuration, allowing you to monitor and adjust various parameters as needed.
Next Steps
If you finished all steps above successfully then it's time to determine your next course of action.
If you want learn more about camera interfaces and hardware, navigate to "Know Your Device" page.
If you wish to jump into programming, we suggest you to proceed with "Building and Flashing Firmware", where you get the comprehensive information on where to get and how to handle the firmware.